
NeoMultiX Documentation

Getting Started with NeoMultiX

NeoMultiX provides a modern foundation for creators, solopreneurs, startups, and businesses to quickly launch powerful websites, digital products, and content hubs with exceptional performance, speed, and elegant design.

Thank You & Welcome

Welcome to NeoMultiX

Thank you for choosing NeoMultiX! Our mission is to provide a fast, beautifully designed, and versatile platform for everyoneβ€”from beginners discovering the world of programming to professional developers building high-quality products for their clients.

Key Features

Everything you need to ship production-grade applications.

Framework

Powered by Next.js 16

Multi-purpose architecture ready for AI Services, E-commerce, Blogs, Landing Pages, and more.

Database

No-SQL & Serverless Ready

Start instantly without setting up a database, or connect your favorite serverless infrastructure.

CMS

Markdown Data Engine

Pre-configured to seamlessly parse and render your product items and blog posts directly from Markdown.

Commerce

Flexible Payments

Includes built-in Whop Embed Checkout integration, with easy setup for Shopify and PayPal.

Hosting

Cloudflare & Vercel Optimized

Fine-tuned to deliver blazing-fast edge performance on Cloudflare Pages, Vercel, and Netlify.

Docs

Comprehensive Guides

Step-by-step documentation and video tutorials designed to help you customize and master NeoMultiX.

System Requirements

NeoMultiX requires Next.js 16 and Node.js installed locally. Works smoothly with pnpm, npm, or yarn.

What's Included
  • Full NeoMultiX Source Code
  • Complete Documentation & Guides
  • Commercial License & Terms

Installation Guide

Follow these step-by-step instructions to set up, run, and deploy NeoMultiX seamlessly.

Install Node.js Runtime

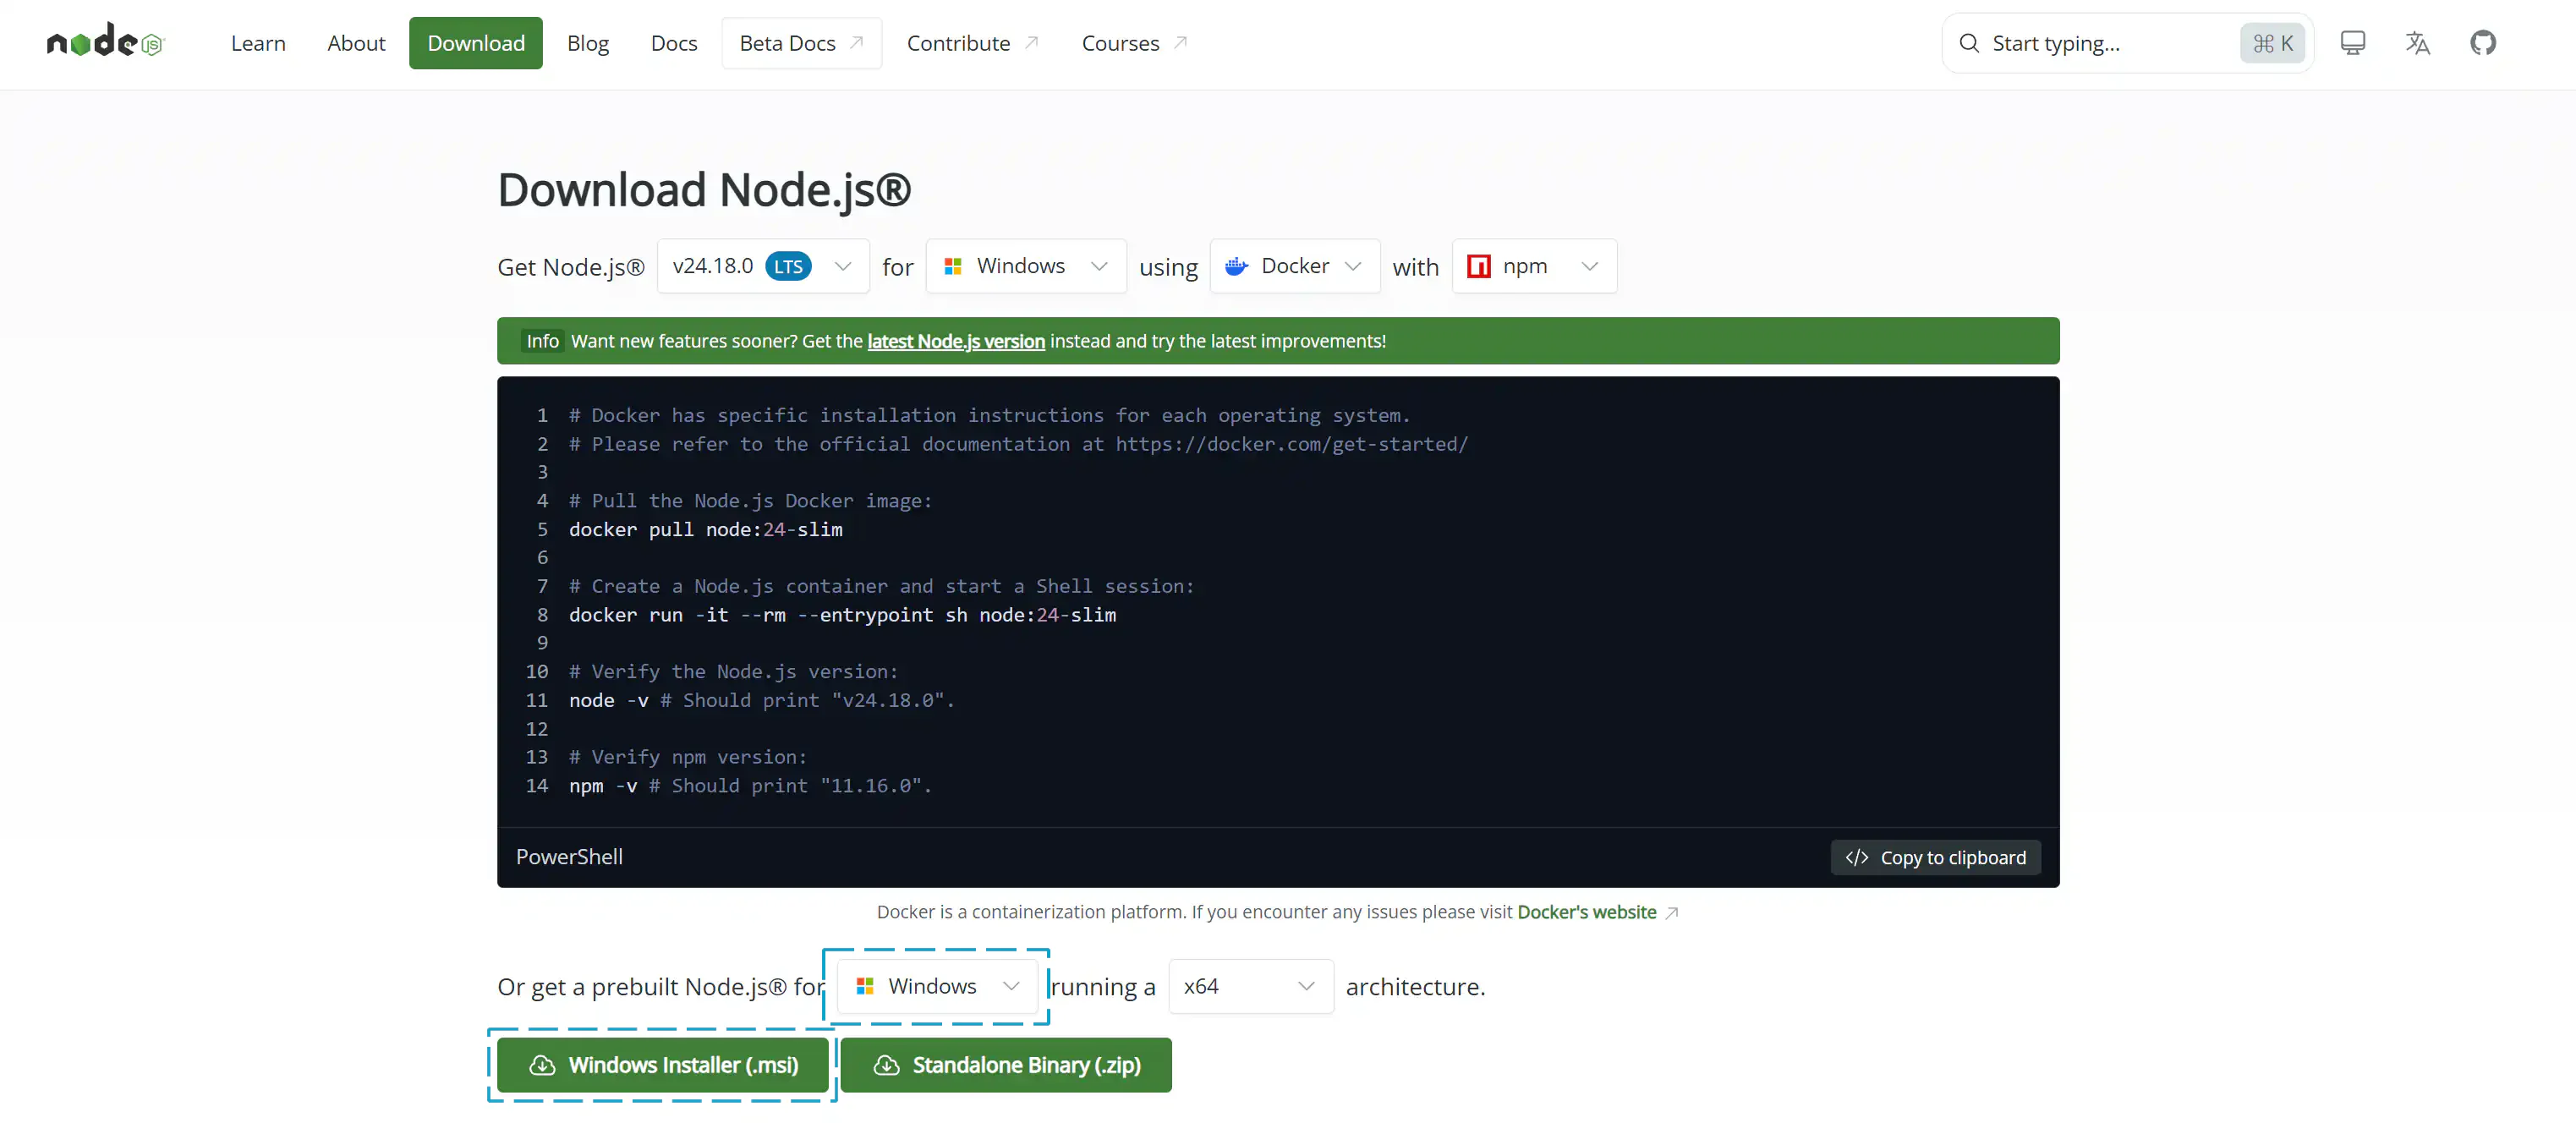
Why Node.js? NeoMultiX relies on Next.js 16 and modern JavaScript tools. Node.js provides the JavaScript runtime environment required to parse code, run local development servers, and manage dependencies. We recommend installing Node.js 18+ LTS.

If you are on Windows, choose the windows installer.msi installer. For macOS users, download the macOS Installer.pkg package.

Download Nodejs
Step 2

Open in Code Editor & Run Locally

A. Add NeoMultiX Folder to Your Code Editor

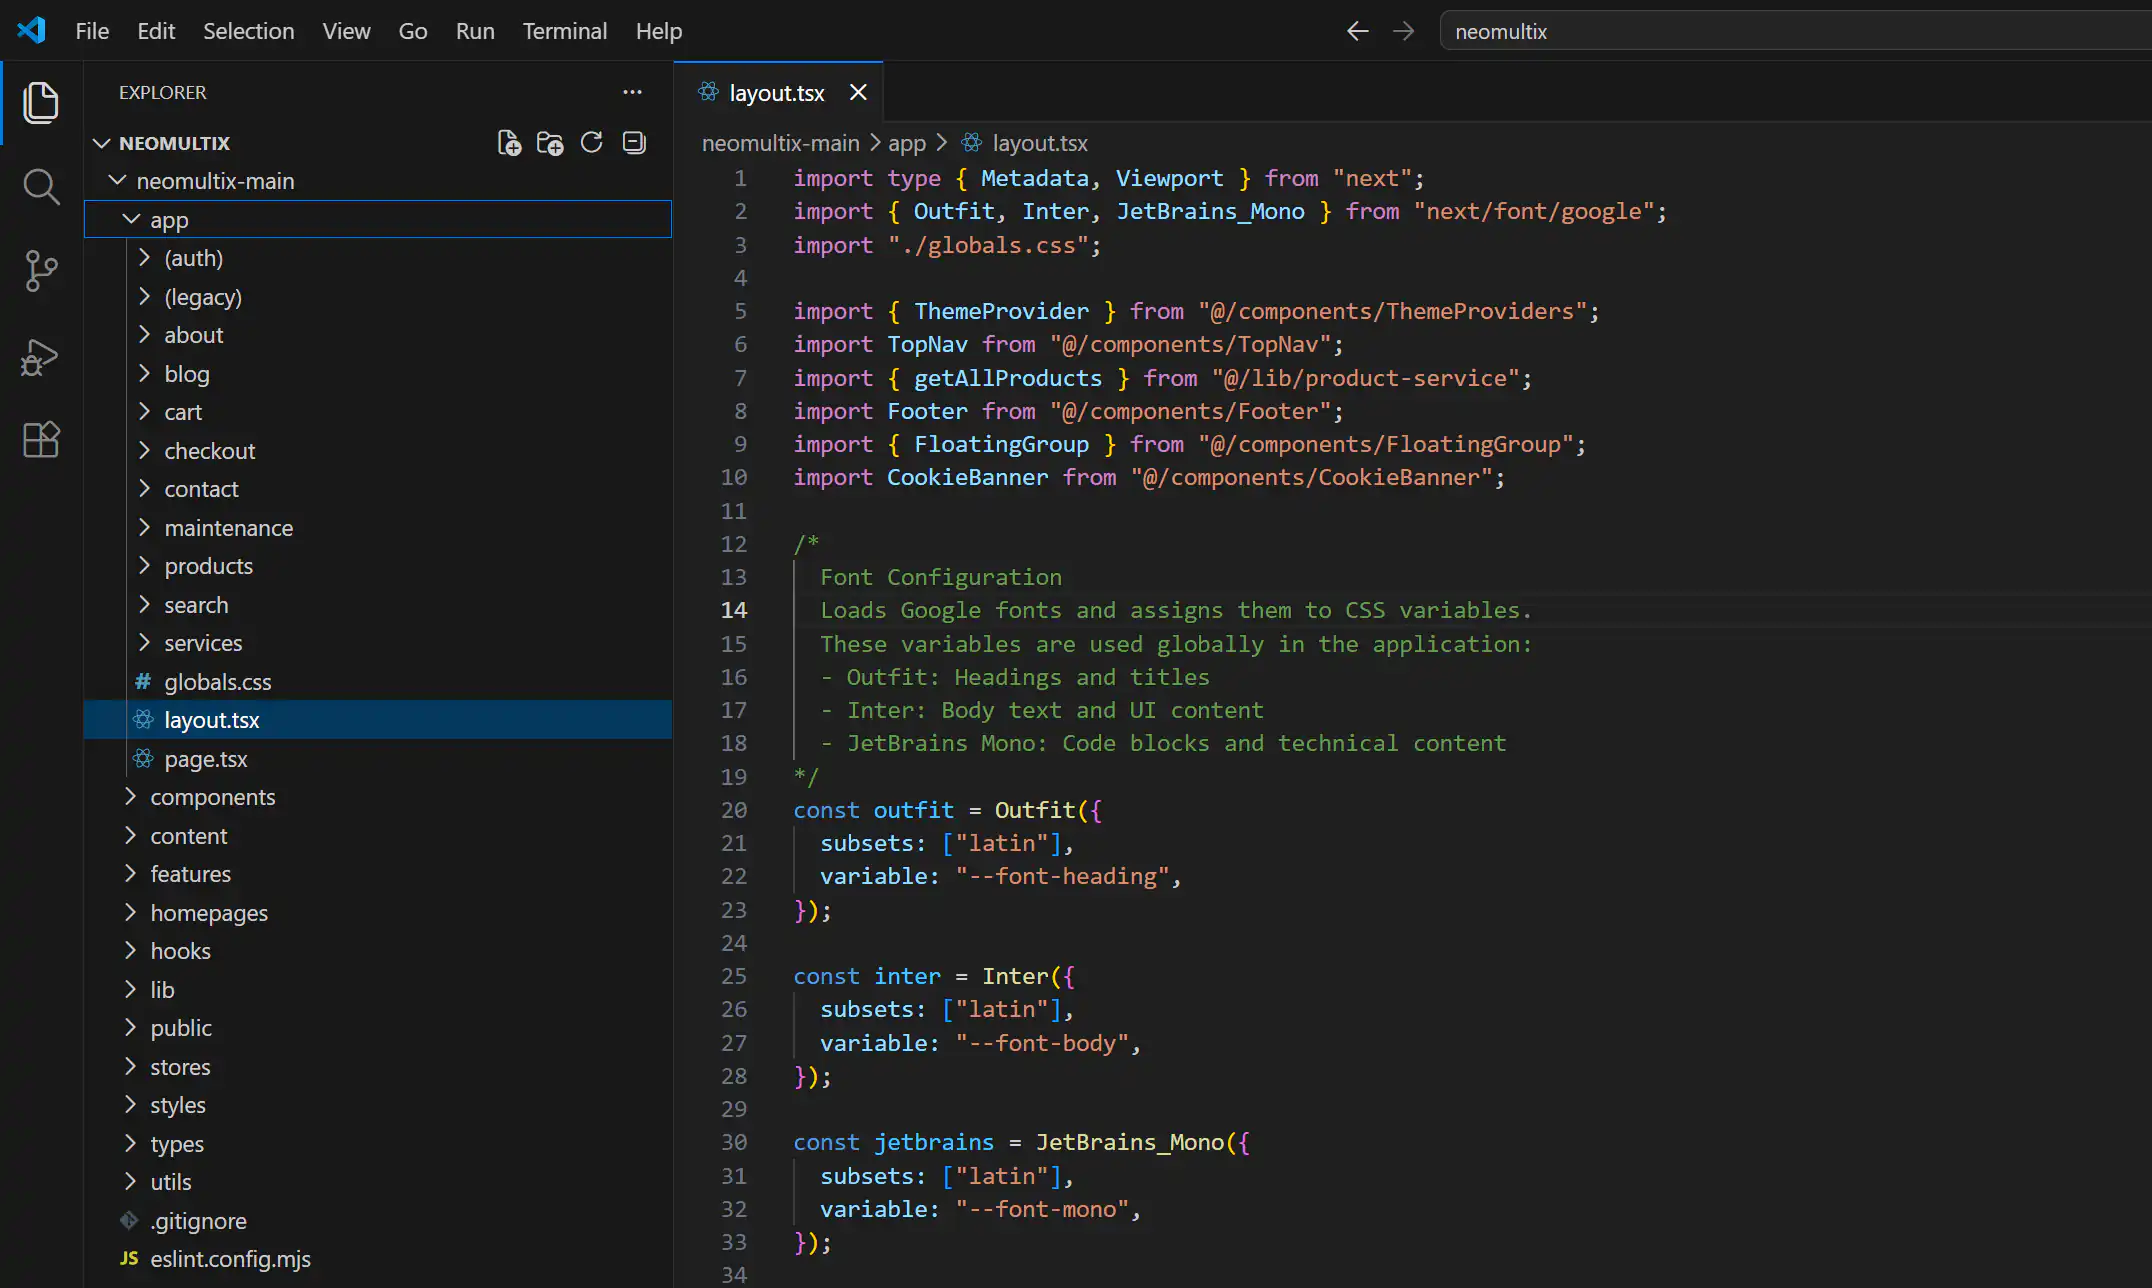
Launch your preferred Code Editor such as VS Code, Cursor, WebStorm, or Sublime Text. Go to File > Open Folder... (or press Ctrl + O / Cmd + O), select your extracted NeoMultiX project folder, and click Open.

Code Editor Workspace

B. Install Dependencies

Open the integrated terminal in your editor (Ctrl + `), navigate to the neomultix-main folder, and run:

npm install

C. Start Development Server

npm run dev

Open your browser and navigate to http://localhost:3000 to view your project live.

Step 3Edge Deployment

Deploy to Cloudflare Pages

NeoMultiX is fully optimized for Cloudflare Pages edge delivery using @cloudflare/next-on-pages. Connect your Git repository to trigger automatic builds on every push to the main branch.

  1. Connect Repository:Log in to Cloudflare Dashboard > Workers & Pages > Create application > Pages, then select your GitHub/GitLab repository.
  2. Configure Build Settings: Set the build preset and output directory according to the recommended configuration below.
  3. Set Environment Variables: Add required runtime variables such as NODE_VERSION
Recommended Cloudflare Build Settings
Framework PresetNext.js
Build Commandnpx @cloudflare/next-on-pages@1
Build Output Directory.vercel/output/static
Environment VariableNODE_VERSION = 20
TerminalGit Push
# Push your changes to trigger automatic deployment
git add .
git commit -m "Deploying NeoMultiX to Cloudflare Pages"
git push origin main
/

Deploy to Vercel via GitHub

Follow these steps to push your project code to GitHub and link it directly to Vercel for automatic deployment.

1. Push Source Code to GitHub

Create a new repository on GitHub, then run the following Git commands in your VS Code terminal:

# Initialize Git & commit changes

git init

git add .

git commit -m "Initial NeoMultiX commit"

# Link your remote repository and push

git branch -M main

git remote add origin https://github.com/your-username/your-repo.git

git push -u origin main

2. Import Repository in Vercel

  • Go to Vercel.com and log in with your GitHub account.
  • Click on "Add New..." > "Project" from your Vercel Dashboard.
  • Find your newly created NeoMultiX repository in the list and click "Import".

3. Configure & Deploy

Vercel will automatically detect Next.js as the framework preset. If your project uses environment variables, add them under the Environment Variables section before clicking "Deploy".

πŸŽ‰ Once deployed, Vercel provides a live URL and automatically updates your production site whenever you push new commits to GitHub!

Site Configuration & Customization

Learn how to customize your branding, SEO metadata, fonts, and global color themes in NeoMultiX.

Branding & SEO

Metadata, Site Title, Favicon & Logo

All primary site configurationsβ€”including Site Title, Metadata, Favicons, and Open Graph tagsβ€”are defined inside the app/layout.tsx file for optimal SEO performance.

app/layout.tsxTypeScript
import type { Metadata } from 'next';

export const metadata: Metadata = {
  title: "Your Site Title - NeoMultiX",
  description: "Your site description for SEO optimization",
  icons: {
    icon: "/favicon.webp",
    apple: "/apple-touch-icon.webp",
  },
  openGraph: {
    title: "Your Site Title",
    description: "Your site description",
    images: ["/ogimage.webp"],
  },
};
Brand Assets Management:
  • Place your Favicon, Logo, Touch Icon (iOS), and Open Graph image (ogimage) inside the public/ directory.
  • You can use free tools like GIMP to convert your images to the .webp format for smaller file sizes and faster page loading speeds.
Metadata & Favicon Layout Preview
Metadata Tile Logo
Styling

Global Theme & Accent Colors

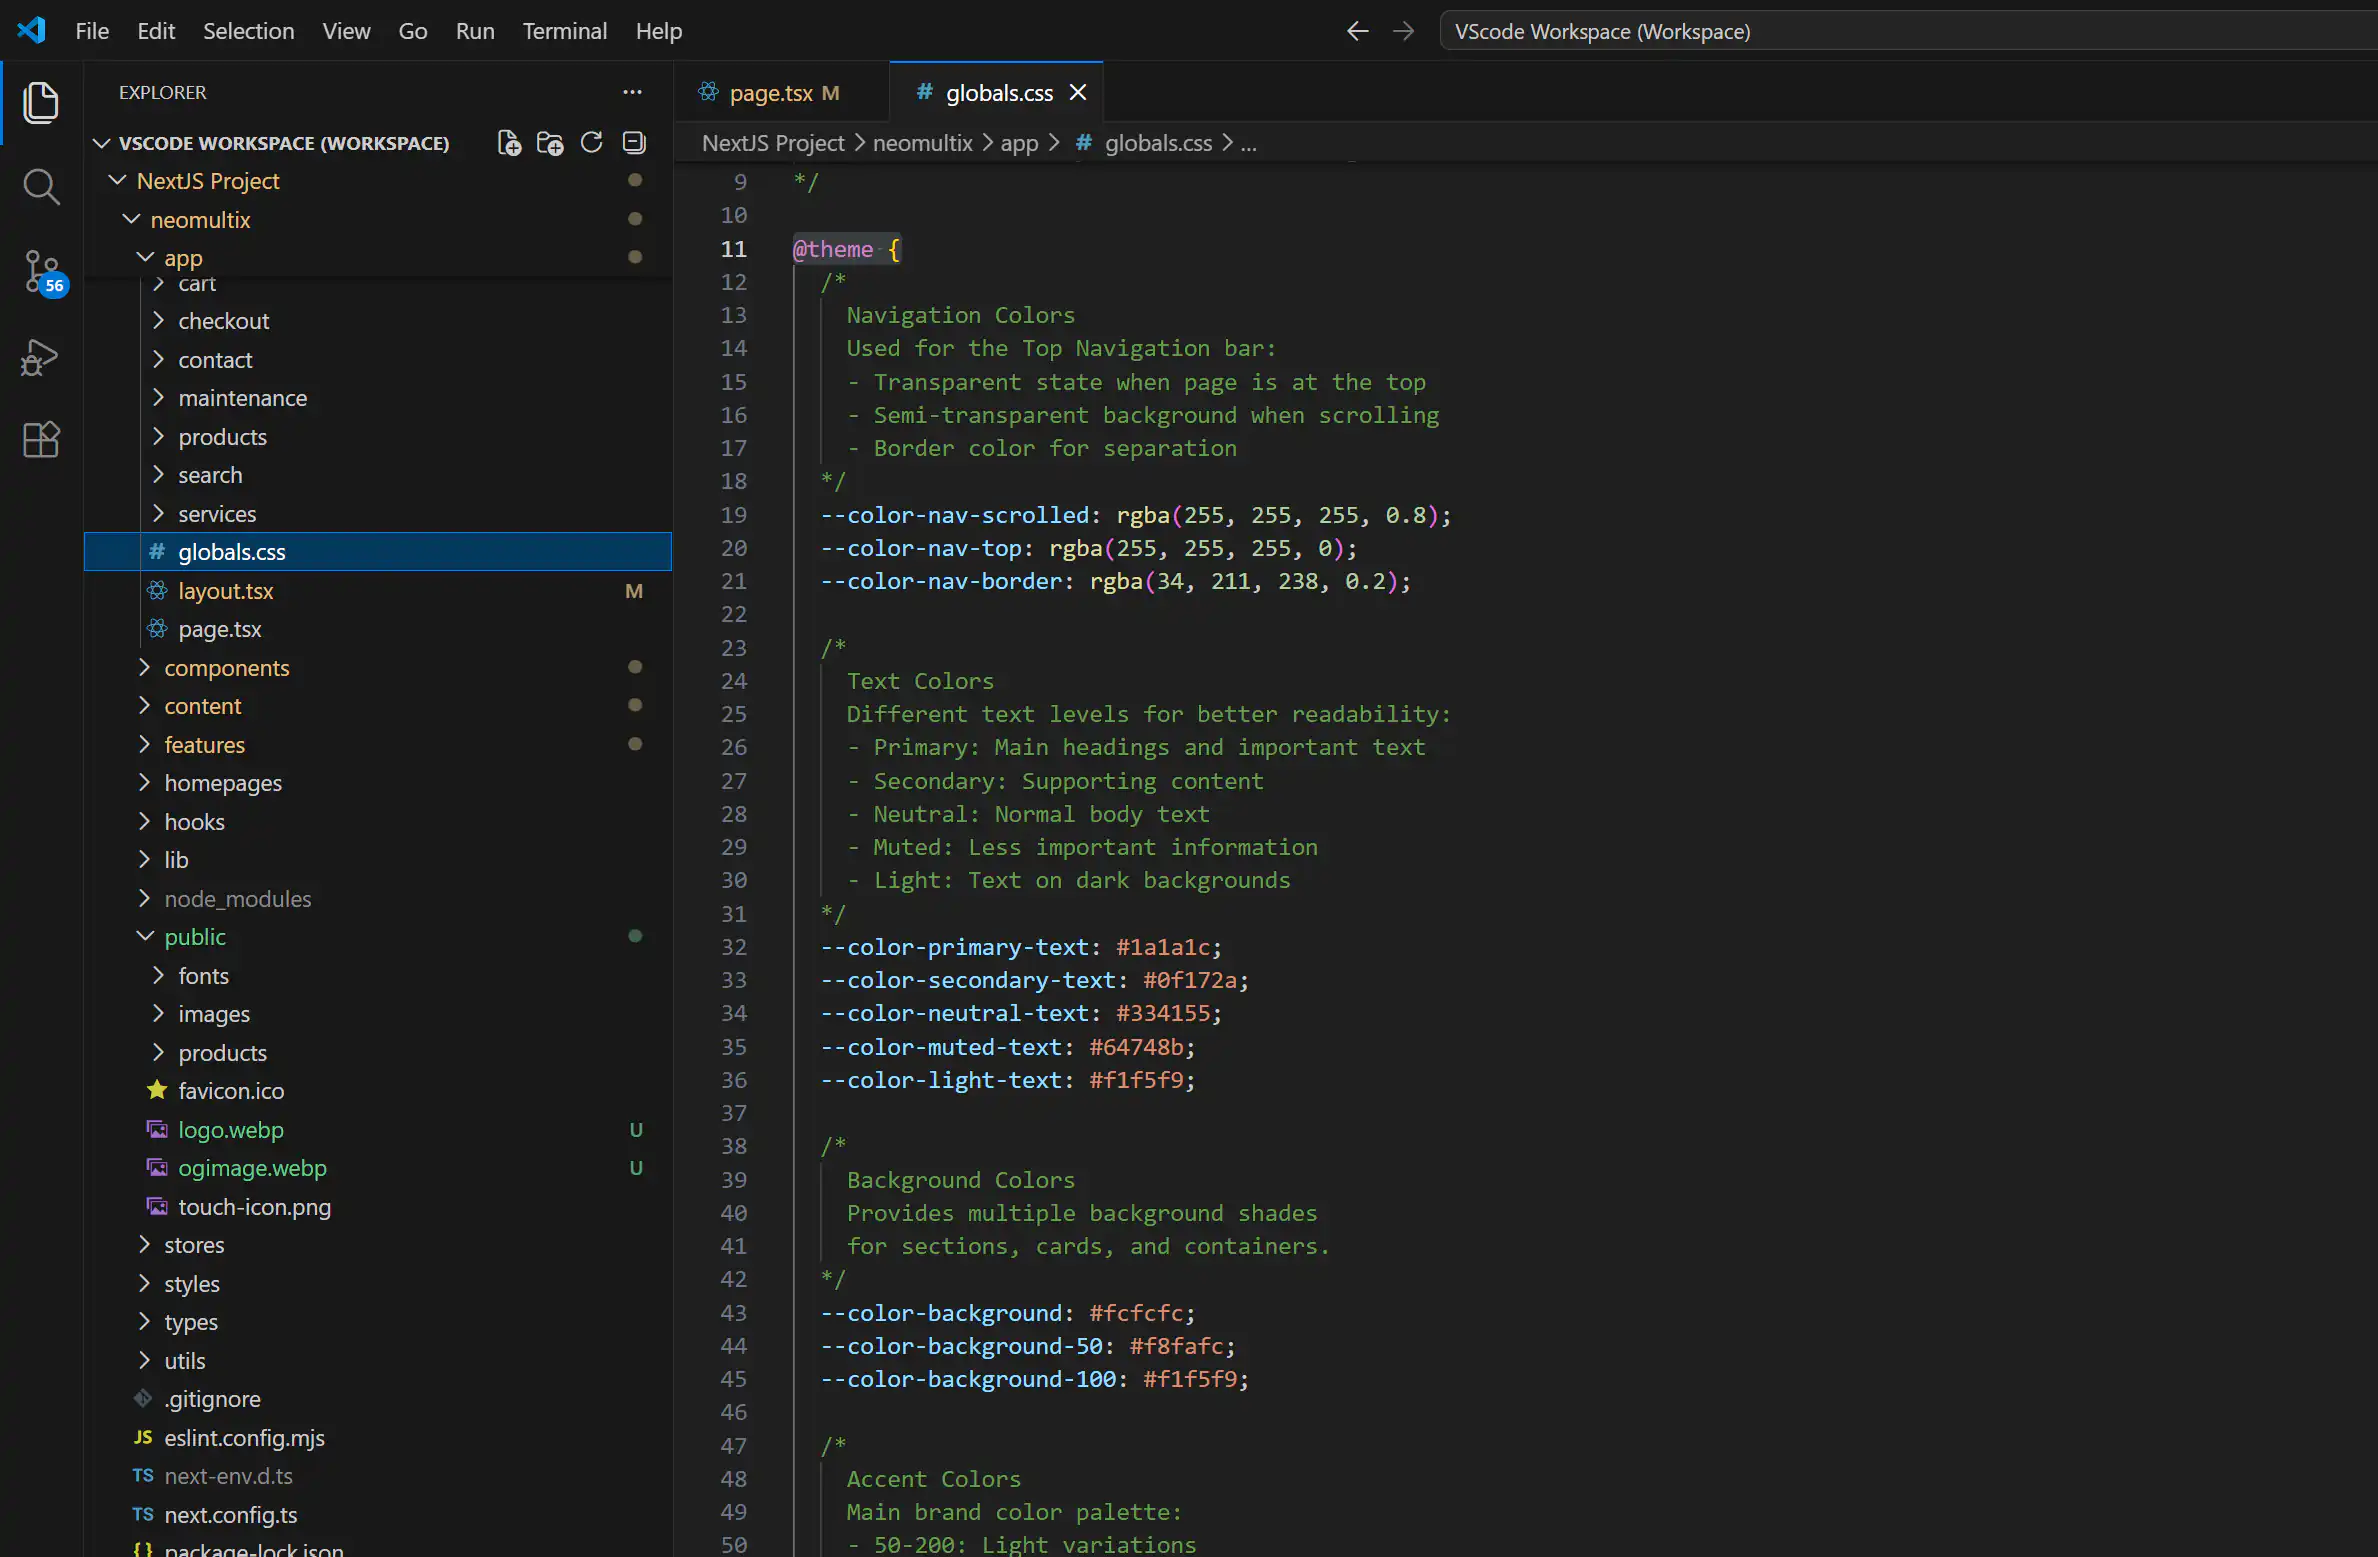
You can easily customize the overall color scheme, background hues, and primary accent colors of your website directly in the app/globals.css file. The template uses CSS variables integrated with Tailwind CSS for seamless theme switching.

app/globals.cssCSS
@theme {
  --color-accent-50: #ecfeff;
  --color-accent-100: #cffafe;
  --color-accent-200: #a5f3fc;
  --color-accent-400: #22d3ee;
  --color-accent-500: #06b6d4;
  --color-accent-600: #0891b2;
  --color-accent-800: #155e75;
  --color-accent-900: #164e63;
    }
  }
Global Theme & Color Variable Configuration
Global Theme and Accent Colors
Typography

Custom Fonts Setup

Fonts are configured with zero layout shift (CLS) using Next.js font optimization (next/font/google). Follow these steps to customize typography in app/layout.tsx:

  1. Import Google Fonts: Import your preferred fonts from next/font/google.
  2. Configure CSS Variables: Initialize font instances with font subsets and custom CSS variable names (e.g., --font-heading, --font-body).
  3. Inject into HTML: Attach the font variable class names to the <html> element to make them accessible across Tailwind CSS and global styles.
app/layout.tsxTypeScript
import { Outfit, Inter, JetBrains_Mono } from "next/font/google";

// 1. Initialize Google Fonts with custom CSS variables
const outfit = Outfit({ 
  subsets: ["latin"], 
  variable: "--font-heading" 
});

const inter = Inter({ 
  subsets: ["latin"], 
  variable: "--font-body" 
});

const jetbrains = JetBrains_Mono({ 
  subsets: ["latin"], 
  variable: "--font-mono" 
});

// 2. Inject font variable classnames into the root HTML layout
export default function RootLayout({ children }: { children: React.ReactNode }) {
  return (
    <html lang="en" className={`${outfit.variable} ${inter.variable} ${jetbrains.variable}`}>
      <body className="font-body text-slate-900 dark:text-slate-100">
        {children}
      </body>
    </html>
  );
}
Content Architecture

Content Management System

NeoMultiX uses local Markdown (.md) files for seamless dynamic content rendering. Simply drop files into the target content folders, and the system automatically parses frontmatter, handles URL slug routing, and applies structural sanitation.

Blog Postscontent/blog/

MDX content parsing and frontmatter setup. File names serve as URL slugs (spaces and hyphens - are both accepted without errors).

4 Layout Templates

Supports style-1 through style-4 to instantly change article presentation layouts.

Resilient Metadata Parsing

Omit any non-required metadata tags freely β€” NeoMultiX automatically validates and sanitizes missing entries.

Sample File: content/blog/getting-started.md
---
title: "Getting Started with Markdown for Modern Blogging"
description: "Learn how Markdown simplifies content creation for blogs with clean syntax, tables, images, lists, and headings."
excerpt: "A practical introduction to writing blog posts in Markdown, including formatting tips and examples for developers and content creators."
category: ["Tutorial"]
tags: ["Markdown", "Blogging", "Documentation"]
date: "2026-06-22"
dateUpdate: "2026-06-23"
readTime: "5 min read"
author: "NeoSimpleLab"
avatar: "/logo.webp"
thumbnail: "https://images.unsplash.com/photo-1499750310107-5fef28a66643?auto=format&fit=crop&q=80&w=1200"
style: "style-2"
---

# Your Article Content Starts Here

Write standard Markdown body content here...

Products Catalogcontent/products/

Comprehensive metadata configuration for physical and digital products, with native Whop integration and custom checkout links.

Whop E-Commerce

Set id to your Whop Plan ID (plan_xxx) and assign downloadlink for post-purchase access.

Direct / Affiliate Checkout

Enable directPurchaseEnabled: "yes" and specify your custom affiliate or external purchase URL in directPurchaseLink.

Product Style

Choose between 3 distinct rendering layouts (style-1 to style-3) and 2 item types (physical or digital).

Sample File: content/products/vba-book.md
---
# General Information (SEO & Metadata)
id: "plan_QfLYqOkgcxByI" # Whop Plan ID
title: "Style 2: Master VBA Programming (Physical Book) - Complete Excel Automation Guide"
description: "A professionally printed VBA programming book covering Excel automation from beginner to advanced. Learn through practical projects, business examples, and step-by-step tutorials."
excerpt: "A premium printed VBA programming book with over 500 pages of practical Excel automation techniques and real-world projects."
brand: "NeoSimple"
vendor: "NeoSimpleLab"
category: ["Programming", "Books", "Excel", "Test"]
tags: ["VBA", "Excel", "Programming", "Printed Book", "Automation"]
date: "2026-06-29"
dateUpdate: "2026-06-29"
author: "NeoSimpleLab"
avatar: "/favicon.ico"

# Style & Whop Delivery Integration
style: "style-2" # Options: style-1, style-2, style-3
productType: "physical" # Options: physical | digital
downloadlink: "https://sandbox.whop.com/neostoredev/content-to-download-2-right-click-duplicate-OFnJqjUWoYm2Lp/app/" # Post-checkout redirection URL (managed by Whop)

# Product Images
thumbnail: "https://images.unsplash.com/photo-1544716278-ca5e3f4abd8c?q=80&w=800&auto=format&fit=crop"
images:
  - "https://images.unsplash.com/photo-1516116216624-53e697fedbea?q=80&w=800&auto=format&fit=crop"
  - "https://images.unsplash.com/photo-1555066931-4365d14bab8c?q=80&w=800&auto=format&fit=crop"
  - "https://images.unsplash.com/photo-1589998059171-988d887df646?q=80&w=800&auto=format&fit=crop"

# Sales & Direct Purchase Options
originalPrice: 59.00
salePrice: 20.00
sku: "BOOK-VBA-001"
taxable: true
taxCode: "txcd_10000000"
currency: "USD"
directPurchaseEnabled: "no" # Set "yes" for external / affiliate link redirection
directPurchaseLink: ""    # Target URL when direct purchase is enabled
expertRating: 3.5

# Inventory Management
trackInventory: true
stockStatus: "in_stock"
stockQuantity: 5
allowBackorder: false

# Physical Shipping Metadata (Applicable if productType is "physical")
shippingRequired: true
weight: 1.15
weightUnit: "kg"
dimensions:
  length: 28
  width: 22
  height: 3.5
  unit: "cm"

# Digital Delivery Metadata (Applicable if productType is "digital")
downloadable: false
instantDelivery: false
licenseType: ""
downloadLimit: 0
downloadExpiry: 0
fileFormat: []
fileSize: ""
---

## Product Overview

Write full product specifications, features, and rich Markdown content here...

Layout

In this section, we will explore how to customize the HomePage, Top Navigation, Footer, and other content pages throughout the website.

Layout Customization

Home Page Setup

To customize the homepage layout, open the app/page.tsx file where homepage templates are managed. Each homepage variant has its own design located in the features/homepages directory.

  1. Open the Homepage Controller: Navigate to app/page.tsx which controls which homepage component is currently rendered.
  2. Select a Template: Import your desired layout component from @/features/homepages (e.g., SaaSHome, AIHome, EcommerceHome, etc.).
  3. Replace the Component: Update the rendered component inside the HomePage() function with your preferred template.
app/page.tsxTypeScript
/*
  Homepage Controller
  This file controls which homepage layout is displayed.
*/

import DefaultHome from "@/features/homepages/DefaultHome";
import AIHome from "@/features/homepages/AIHome";
import SaaSHome from "@/features/homepages/SaaSHome";
import BlogHome from "@/features/homepages/BlogHome";
import EcommerceHome from "@/features/homepages/EcommerceHome";

import { getAllBlogs } from "@/lib/blog-service";
import { getAllProducts } from "@/lib/product-service";

export default function HomePage() {
  // Fetch data on the server
  const blogs = getAllBlogs();
  const allProducts = getAllProducts();

  return (
    <div>
      {/* 
        <DefaultHome />
        <SaaSHome />
        <BlogHome blogs={blogs} />
        <AIHome />
      */}
      <EcommerceHome initialProducts={allProducts} />
    </div>
  );
}
Blog Customization

Blog Architecture & Layouts

The blog system is structured into two main parts: single article presentation styles and the main blog listing page. You can customize individual post layouts or modify the overall blog page directory.

  1. Single Article Styles: Manage and create detail page layouts inside components/blog-styles/ (e.g., style-1.tsx, style-2.tsx). Export all layout variants through index.tsx.
  2. Main Blog Listing Page: The main aggregated blog post list page is located at features/blogpage.tsx.
Project StructureDirectory
components/
└── blog-styles/            <-- Article style templates (/blog/single-blog)
    β”œβ”€β”€ style-1.tsx         <-- Layout pattern 1
    β”œβ”€β”€ style-2.tsx         <-- Layout pattern 2
    └── index.tsx           <-- Central exporter

features/
└── blogpage.tsx            <-- Blog listing page component (/blog)
E-Commerce Customization

Product Architecture & Layouts

The product catalog architecture separates single product detail presentation from product listing pages. The main product catalog is routed at domain/products, while individual product pages are available at domain/products/single-product.

  1. Product Detail Layout Styles (/products/single-product): Manage and design single product detail pages inside components/product-styles/ (e.g., style-1.tsx, style-2.tsx). Use index.tsx as the central style switcher controller.
  2. Main Product Listing Page (/products): The main product catalog listing page is managed in features/productpage.tsx.
Project Structure & RoutesDirectory
components/
└── product-styles/          <-- Product detail layout templates (/products/single-product)
    β”œβ”€β”€ style-1.tsx          <-- Layout pattern 1
    β”œβ”€β”€ style-2.tsx          <-- Layout pattern 2
    └── index.tsx            <-- Style switcher controller

features/
└── productpage.tsx          <-- Product catalog listing component (/products)

Commerce

Built-in store and payment processing flows.

Cart & Payment Setup

Cart Page & Gateway Architecture

The cart page manages state using Zustand and supports both Digital and Physical products. It features a built-in interface for Whop while allowing flexible toggling for other payment gateways.

  1. State Management (Zustand): All cart data and the addToCart function are handled inside stores/useCartStore.ts.
  2. Navigation & Cart Count: The cart item counter button (CartCount) and navigation link are integrated inside components/TopNav.tsx.
  3. Product Types & Payment Support: The features/cart/CartPage.tsx component comes ready for Whop and supports both Digital and Physical items. For other gateways (PayPal, Shopify, Snipcart), you will need to link your own API or backend server.
Project StructureDirectory
app/
└── cart/
    └── page.tsx          <-- Checkout / Cart page (/cart)

components/
└── TopNav.tsx            <-- Top navigation bar containing CartCount button and link

features/
└── cart/
    └── CartPage.tsx      <-- Cart page UI (ready for Whop, Digital & Physical)

stores/
└── useCartStore.ts       <-- Cart state management with Zustand (includes addToCart)
features/cart/CartPage.tsxPayment Gateways Config
// Toggle payment gateways inside CartPage.tsx
// Whop is pre-integrated; other gateways require custom API/Server integration.

const paymentGateways = {
  whop: true,     // Set to false to hide
  paypal: false,  // Set to false to hide
  shopify: true,  // Set to false to hide
  snipcart: false, // Set to false to hide
};
Whop Checkout Integration

Whop Hosted Checkout & Success Handling

NeoMultiX utilizes Hosted Checkout with Whop by embedding Whop's checkout experience directly into your checkout page. This eliminates the need to build a custom customer dashboard or handle complex APIsβ€”Whop manages customer accounts, orders, and secure digital downloads for you.

  1. Embedded Checkout Experience: Integrates Whop's hosted embed checkout seamlessly inside features/checkout/WhopCheckoutPage.jsx.
  2. Success Return Route: After a successful transaction, Whop redirects users back to the success handler. Remember to replace localhost:3000 with your production domain inside the returnUrl property.
  3. Protected Downloads & Fulfillment: Handled in features/checkout/WhopSuccessPage.tsx. It reads local cart data to record completed purchases and retrieves Whop's secure download links, ensuring only verified buyers gain access.
  4. Extensible Architecture: While Whop is pre-configured for instant setup, NeoMultiX is built modularly so you can easily integrate alternative gateways. Reach out to our support team if you need assistance during customization.
Project StructureDirectory
app/
└── checkout/
    β”œβ”€β”€ page.jsx                <-- Main checkout page route (/checkout)
    └── whop-success/
        └── page.jsx            <-- Checkout success callback route (/checkout/whop-success)

features/
└── checkout/
    β”œβ”€β”€ WhopCheckoutPage.jsx    <-- Embeds Whop hosted checkout (configures returnUrl)
    └── WhopSuccessPage.tsx     <-- Reads cart storage, generates order data & extracts Whop download links
features/checkout/WhopCheckoutPage.jsxReturn URL Configuration
// Whop Embedded Checkout Configuration
// Ensure returnUrl matches your deployed site domain in production

const returnUrl = process.env.NODE_ENV === "production"
  ? "https://yourdomain.com/checkout/whop-success"
  : "http://localhost:3000/checkout/whop-success";
Whop Custom Bundles

Whop Custom Bundles

This section is specifically tailored for selling physical items or multi-item carts via Whop. Because Whop native checkouts do not natively support multi-quantity for a single product or shopping carts containing multiple different products, NeoMultiX utilizes Whop Bundles to seamlessly map cart combinations to a single Whop plan ID.

  1. Bundle Mapping Location: The configuration file for bundle mapping is located directly in features/checkout/WhopCheckoutPage.tsx.
  2. Matching Logic: Define your target bundlePlanId alongside the array of requiredIds that trigger it when added together in the cart.
  3. Fulfillment Link: Assign a dedicated bundleDownloadLink or access URL that customers receive upon successful checkout of the bundle.
Project StructureDirectory
features/
└── checkout/
    └── WhopCheckoutPage.tsx    <-- Configure BUNDLE_CONFIG mapping here
features/checkout/WhopCheckoutPage.tsxBundle Configuration
// 1. DEFINE BUNDLE LOGIC HERE
const BUNDLE_CONFIG = [
  {
    bundlePlanId: "plan_WUki0OsMKNWFb", // Whop plan ID for this bundle
    requiredIds: ["plan_FoQBxNZ2EIFs4", "plan_QfLYqOkgcxByI"], // Product IDs within the bundle
    bundleDownloadLink:
      "https://sandbox.whop.com/joined/neostoredev/content-to-bundle-QkGqzCDtzDnIsh/app/", // Download/Access link
  },
  // Add other bundles if needed
];

Deployment & Domain Setup

Learn how to deploy your NeoMultiX application and connect a custom domain using Cloudflare Pages or Vercel.

Cloudflare Deployment

1. Connecting Custom Domain to Cloudflare Pages

Cloudflare Pages provides global CDN routing and automatic SSL certificates. Deploy your application via Git or Wrangler CLI, then attach your custom domain directly through the Cloudflare Dashboard.

  1. Push Code to Repository: Push your latest changes to your remote Git repository (main branch).
  2. Create Cloudflare Pages Project:Go to the Cloudflare Dashboard > Workers & Pages > Create application > Pages and connect your repository.
  3. Add Custom Domain: Open your project settings, navigate to the Custom domains tab, click Set up a custom domain, and enter your domain name.
Vercel Deployment

2. Connecting Custom Domain to Vercel

Vercel offers seamless Next.js deployments with zero-configuration domain assignment and automatic SSL provision.

  1. Deploy Application: Import your repository into Vercel or run vercel --prod from your CLI.
  2. Configure Domains:Go to your Project Dashboard > Settings > Domains.
  3. Add Domain: Type your custom domain name (e.g., yourdomain.com) and click Add.